It’s easy to understand why a quality car seat for our kids is incredibly important. But what is even more important is learning how to install a car seat for kids. For years, it’s been necessary to use standard children’s car seats in your vehicle to ensure your children’s safety in case of accidents. Recognizing the inherent danger of driving, it’s crucial to take all necessary precautions to protect our children.
But whether you’re a new, soon-to-be, or an experienced parent struggling with how to install a new seat for kids, we’ve got you covered. We aim to provide parents with a simple guide to installing car seats and recommendations for starting your car seat shopping.
But before you go through the trouble of installing the new child car seat, ensure that you have a car that meets all your family’s needs. And if you’re in the market for a new car, it’s never been easier to shop for a new car than it is now with services like Carvana! You can do all of your research, shopping and buying all online with Carvana’s services!
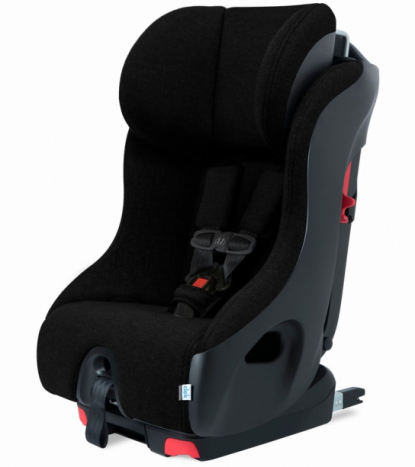
For this guide, we are using the Clek Foonf Convertible Car Seat to show you how to install a car seat for kids. This seat comes with an anti rebound bar, preventing rebound in a side-impact collision. The design also allows for extended rear-facing use, and can accommodate children in a rear-facing position until their 4th birthday (up to 50 lbs). Below are more specifications and features below:
Car Seat Specifications:
- Seating Depth: 12.5 in.
- Seating Height: 21.5-26 in.
- Harness-Slot Height: 8-17 in.
- Width: 13-17 in.
- Fore-Aft Measurement in Rear-Facing: 33 in.
- Height Measurement in Rear-Facing: 25.75-28.75 in.
- Seat Weight in Forward-Facing: 32 in.
- Seat Weight in Rear-Facing: 36 lb
Child Requirements:
Rear-Facing:
- 25-43 in.
- 14-50 lb
- Able to sit upright alone
Forward-Facing Child:
- 30-49 in.
- 22-65 lb
- 2+ years recommended (1 year minimum)
Features:
- Improved Rear-Facing Installation – easy access belt path, small footprint and anti-rebound bar
- Smooth Recline – included is an easy to use recline function, making the ride more comfortable
- GREENGUARD certified – fabric is certified and provides permanent protection against stains, moisture and odor-causing bacteria. Also free of brominated and chlorinated flame retardants.
So now that you know what car seat we’re focused on, let’s break down how to install a car seat for kids (and other standard car seats) safely and simply:
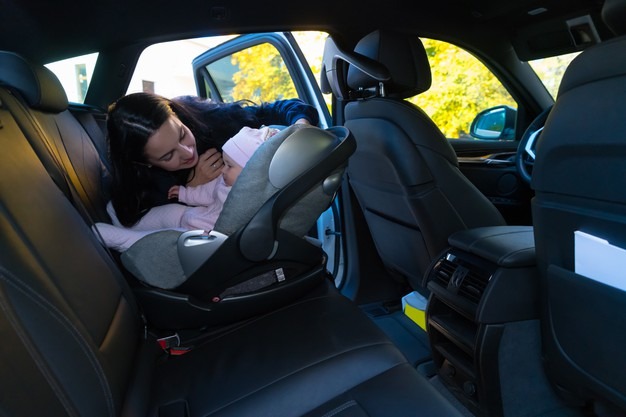
How to Install a Car Seat for Kids: Rear-Facing Infant Seat With a Seat Belt
- Read the manuals: Before you begin, carefully review the instructions in both your car seat’s manual and your vehicle’s owner’s manual. This ensures you don’t miss any crucial information specific to your car seat and vehicle. Pay close attention to the seat belt system and how it interacts with the car seat.
- Choose the right spot: Place the car seat base in the back seat of your vehicle. The middle seat is generally the safest position, but if it doesn’t fit properly, choose an outboard seat (by the window) and make sure the car seat is securely anchored.
- Thread the belt: Locate the rear-facing belt path on your car seat base. This is typically indicated by colored lines or labels. Carefully thread the seat belt through this designated path, ensuring it’s straight and free of twists.
- Buckle and lock: Buckle the seat belt as you normally would and engage the locking mechanism. Refer to your vehicle’s manual for specific instructions on locking the seat belt.
- Tighten the base: With the seat belt buckled and locked, press down firmly on the car seat base. This helps tighten the belt and secure the seat in place.
- The 1-inch rule: Once tightened, the car seat base should not move more than 1 inch in any direction – front, back, or side-to-side. If it moves more than an inch, try re-tightening the belt or consult your car seat manual for troubleshooting tips.
- Recline angle: Most infant car seats need to be in a semi-reclined position for proper head and neck support for your baby. Consult your car seat manual for the specific recommended angle and adjust the base accordingly. This might involve using the recline adjuster lever or additional padding.
- Attach the carrier: Once the base is secure and at the correct angle, attach the infant car seat carrier to the base according to the instructions in your car seat manual. This usually involves clicking the carrier into place until you hear a secure lock.
Before placing your baby in the car seat, double-check all the steps to ensure the seat is properly installed and secure. Refer to your car seat manual and vehicle manual if you have any doubts or encounter difficulties. Remember, a safe and secure car seat installation is crucial for your child’s safety.
How to Install a Car Seat for Kids: Rear-Facing Infant Seat – With Lower Anchors
- First and foremost, read the car seat manual as well as your vehicle’s owner manual. Focus on the placement of the lower anchors.
- Secondly, place the seat base in the second row of the vehicle.
- Thirdly, locate lower anchors in your vehicle.
- Until the straps are not twisted, connect the lower anchor attachments in the seat base to the car lower anchors.
- Press down on the base to tighten. Ensure that the seat passes the 1 inch rule, and that it cannot move more than 1 inch front, back and side to side.
- Ensure the base is at the proper angle for the age of your child, which should be specified in the manual.
- Lastly, attach the carrier to the base.
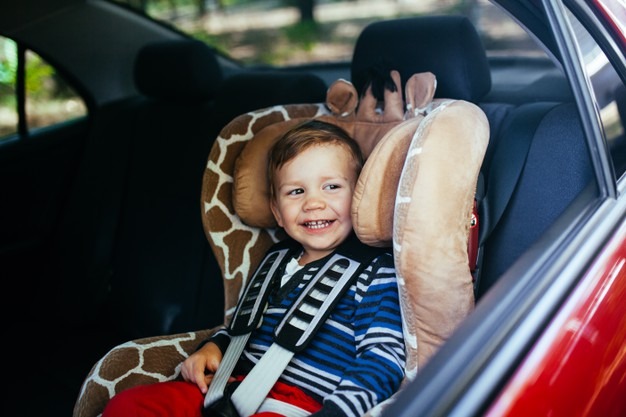
How to Install a Car Seat for Kids: Forward Facing Seat – With a Seat Belt and Tether
- To start, always read your car seat manual and vehicle owner’s manual to ensure that you do not miss any important information regarding the car seat and the vehicle. Most importantly, focus on the seat belt system, and how to install it with your vehicle’s system in mind.
- Following step one, place the car seat in the second row.
- If there are no twists in the belt, thread the seat belt through the belt path.
- Before moving on, buckle and lock the seat belt.
- Press down on the base to tighten. Ensure that the seat passes the 1 inch rule, and that it cannot move more than 1 inch front, back and side to side.
- Always make sure to connect the tether from the car seat to the vehicle’s tether anchor and tighten.

~Advertisement~

How to Install a Car Seat for Kids: Forward Facing Seat – With Lower Anchors and Tether
- Read the car seat manual as well as your vehicle’s owner manual. Focus on the placement of the lower anchors.
- Place the car seat in the second row of the vehicle.
- While you locate the lower anchors in the vehicle, connect the lower anchor attachments of the car seat to the lower anchors, without twisting the straps.
- Press down on the base to tighten. Ensure that the seat passes the 1 inch rule, and that it cannot move more than 1 inch front, back and side to side.
- Connect the tether on the car seat to the tether anchor in the vehicle and tighten.
Keeping your precious cargo safe on the road is paramount. Whether you’re using your vehicle’s seat belt or lower anchors (LATCH system), installing a rear-facing infant car seat correctly is an essential skill for every parent or caregiver.
Remember, these guides are general instructions, and it’s crucial to always refer to the specific manuals for both your car seat and your vehicle before installation. This ensures you follow the exact steps and safety precautions specific to your car seat model and vehicle make. Don’t hesitate to consult a certified child passenger safety technician (CPST) if you have any questions or concerns about the installation process.
Once you’ve familiarized yourself with the manuals and practiced the installation steps, you’ll be confident in securing your little one for every journey. Remember, a properly installed car seat is the best defense you can provide for your child’s safety on the road. So, buckle up, follow the steps, and enjoy the ride together!
To upgrade these car seats you can even add a comfy cover by checking out this article.